- Introduction
- Registration
- Log In
- Navigation
-
Eligibility Lookup
- Initiate Eligibility Lookup
- Initiate Patient Status Lookup
- Beneficiary Eligibility Information Panel
- Part B Deductible
- Medicare Advantage
- Medicare Secondary Payer
- Crossover
- Qualified Medicare Beneficiary
- Home Health Plan
- Hospice Notice of Elections
- Hospice Benefit Periods
- Inpatient and SNF Spell History
- End Stage Renal Disease
- Preventive Services
- Audiology Screening
- Hepatitis Screening
- COVID-19 Vaccine
- Flu Vaccine
- Pneumococcal Vaccine
- Cardiac Rehabilitation
- Pulmonary Rehabilitation
- Acupuncture Benefits
- Smoking Cessation Counseling
- Cognitive Assessment and Care Plan Information
- Therapy
- Diabetes Self Management Training (DSMT)
- Medical Nutrition Therapy (MNT)
- Accessing Eligibility for MDPP in NGSConnex
- Claims Status Inquiry
- Part B Claim Submissions
- Appeals
- ADR
- Inquiries
- Resources
- MBI Lookup
- Remittance
- Part A Prior Authorization Request
- Part B Prior Authorization Request
- Financials
- Manage Account
Check Appeal History
Table of Contents
Check Appeal History
-
Click the Appeals button from the NGSConnex homepage.

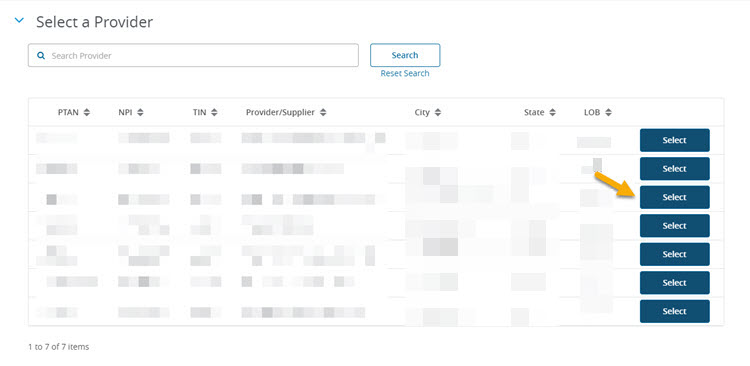
- In the Select a Provider panel, click the Select button next to the applicable provider account.

- Select the Appeal History button.

The last sixty days of NGSConnex appeal submissions for the provider selected are displayed. To search for other NGSConnex appeal submissions or to narrow/expand your search, use the filter options.
- Appeal ID
- From Submit Date
- To Submit Date
- Request Type
- Medicare Number
- Claim Number
- Created By
The following information will be provided:
- Appeal Number
- Submitted Date
- Created By
- Request Type
- Medicare Number
- Beneficiary Name
- Claim Number
- Requester’s Full Name
- Select the Checkbox to the left of the Appeal Number to view a previously submitted appeal request.

- Select View Appeal button.

Attaching Additional Supporting Documentation
If an appeal request has been submitted and is still pending additional supporting documentation can be attached for review by following these steps. Only the person who submitted the original request will have the ability to add additional supporting documentation.
- Select the appeal from the Appeal History panel by selecting the checkbox to the left of the Appeal Number.
- Select the View Appeal button.
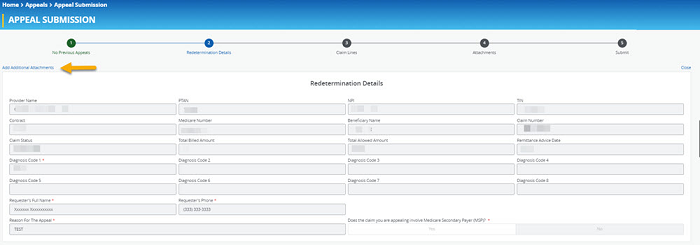
- Select the Add Additional Attachments hyperlink.

Attachments
- In the Attachments section you will upload additional supporting documentation you would like to submit with your request. You have the option to drag and drop and attachment or browse your computer for an attachment. Note: If an attachment was added in error you may delete it by clicking the trash can icon.
- We will accept most common file formats. There are no limits on the number of attachments you may include with your response. It is recommended that you limit the size of each attachment to 25 MB or less. The Attachment Name should be comprised of letters and numbers. If an Attachment Name contains any special characters you must rename the attachment.
- Select the ‘Next’ button.

Submit
- Once you have you have attached all additional supporting documentation, select the Submit button to transmit your request to National Government Services.
- The following message will display indicating the redetermination request was successfully submitted.
- An email verification will be sent to the email address associated with the user profile, acknowledging receipt of the redetermination request.
