Check Status of Prior Authorization Requests
Table of Contents
Check Status of Prior Authorization Requests
You will have the ability to check status of prior authorization requests and view prior authorization decision letters if the requests have been submitted via NGSConnex.
- Click the Prior Authorization button from the NGSConnex homepage.

- In the Select a Provider panel, click the Select button next to the applicable provider account.

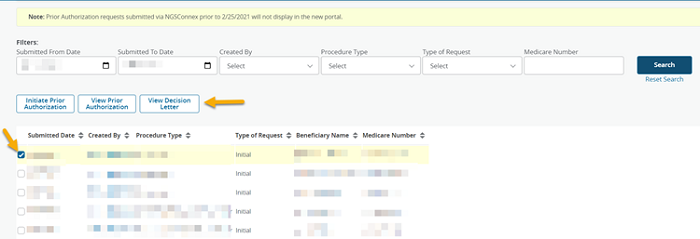
- The last thirty days of NGSConnex prior authorization submissions for the provider selected are displayed, regardless of who within the organization submitted the request. The following information will display:
- Submitted Date
- Created By
- Procedure Type
- Type of Request
- Beneficiary Name
- Medicare Number
- Decision
- Decision Letter

- To search for other NGSConnex prior authorization submissions or to narrow/expand your
search, use the following filter options:
- Submitted From Date
- Submitted To Date
- Created By
- Procedure Type
- Type of Request
- Medicare Number
- Select the Search button. To reset the filters and search for another prior authorization request, click the Reset Search link.

View the Prior Authorization Submission
- Select the Checkbox next to the prior authorization request that you want to check the status of.

- Select the View Prior Authorization button.
- Select the Next button to view each of the prior authorization sections.
- If a prior authorization decision is available, the View Decision Letter button will display. You will have the ability to view, print and/or save the letter electronically. Please allow ten business days before checking prior authorization status.

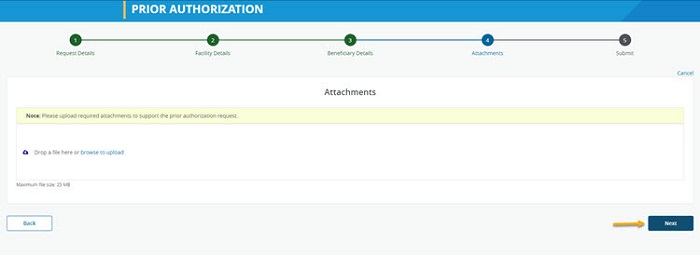
Attachments
When a Prior Authorization request is initiated, you must provide all pertinent supporting documentation. However, if you need to submit additional documentation after a prior authorization request is submitted, and a prior authorization decision has not been issued you may submit additional documentation under the Attachments section.
- In the Attachments section you will upload all supporting documentation you would like to submit with your request. You have the option to drag and drop and attachment or browse your computer for an attachment.
- These file types are accepted, tiff, pdf, doc, docx, docm, xlsx, xls, xlsm, jpg, gif, htm, html, text. There are no limits on the number of attachments you may include with your response. It is recommended that you limit the size of the attachment to 25 MB or less.
- Your attachments will display and you can verify that you have added all of the applicable attachments. If an attachment was added in error, you may delete it prior to submitting your response by select the delete icon.
- Click the Next button to move forward.
- If you are ready to transmit your additional documentation and have it added to your original request, select the Submit button.
- A message will display notifying you that your Prior Authorization request has been submitted successfully. In addition, a confirmation email will be sent to the email address associated with your User Profile.
- Select the Close button to return to the list and initiate another Prior Authorization request or select the Back button to review your request.

Revised 1/23/2024