Creating a 276 Claim Status Request in PC-ACE
Claim Status Request Files must be prepared and transmitted using communication software.
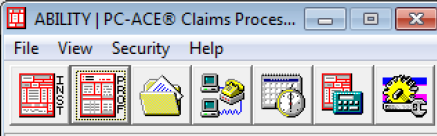
- Select INST or PROF from the PC-ACE Claims Processing System main menu.
- Select List Claims
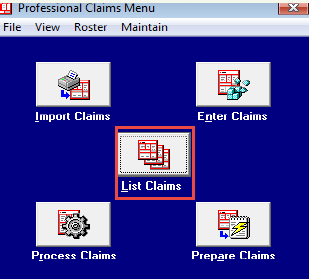
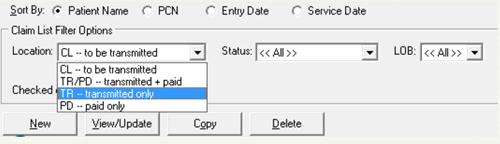
- In the Location drop down, select Transmitted Only.
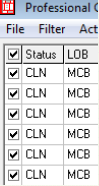
- Put a check next to each claim to be included in the Claim Status Inquire file (276).
- Begin the Claim Status Inquiry (276) Build Process:
a. Select Actions
b. Select Request All Checked Claim Status
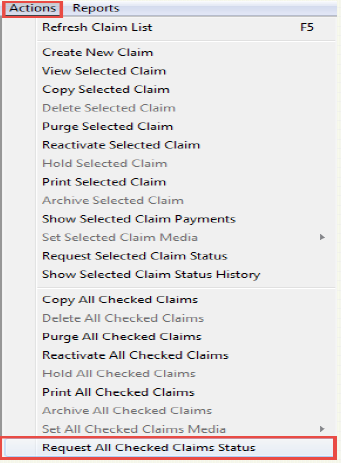
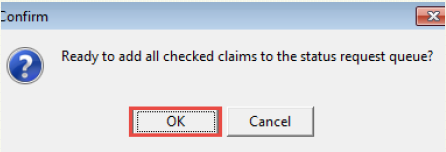
- Confirm: Select OK
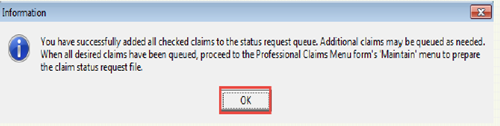
- Information: Select OK
- Close the Claim List

- Prepare the Claim Status Inquiry File (276):
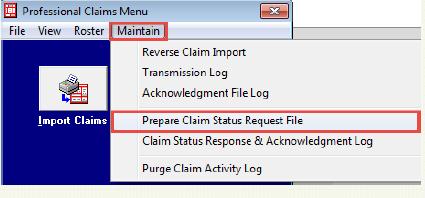
a. Return to the Main Claims Menu
b. Select Maintain
c. Select Prepare Claim Status Request File
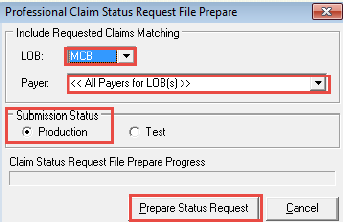
- Select LOB and Contract (one LOB and one contract per 276 file)
a. Select LOB
b. Select Contract
c. Select Production (default value)
d. Select Prepare Status Request
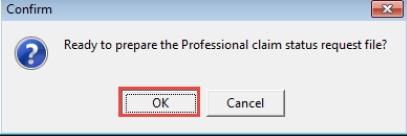
- Confirm: Select OK
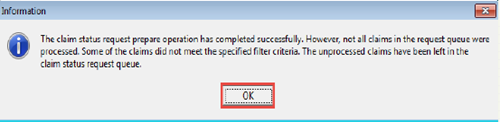
- Information: Select OK
- Review Results Report: Select View Results
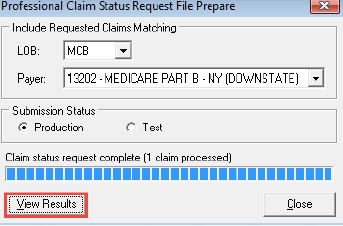
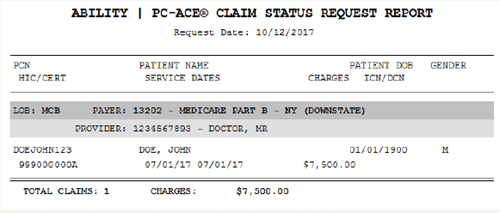
- Claims included in the Claims Status File
- The preparation of claims has now been completed. Prepared claims must be transmitted. Continue to the transmission process using the NSV’s software.
The 276 Claim Status Inquiry transaction can now be submitted until 9:00 p.m. ET with 277 Claim Status Response transactions available by 7:00 a.m. ET the next business day.


Transmission Process
Network Service Vendor
All submitters should connect through a NSV and follow their connection/transmission instructions provided by the NSV to send and receive files.
Note: For Part A, the claims file to be transmitted created by PC-ACE will be named BCREQ276.DAT by default and will be located in the C:\WINPCACE directory.
Note: For Part B, the claims file to be transmitted created by PC-ACE will be named BSREQ276.DAT by default and will be located in the C:\WINPCACE directory.
Importing and Reading the 277 Claim Status Report
In order for PC-ACE to read 277 Claim Status Response files, they must be saved into the proper sub-folder within the WINPCACE folder. 277 files go within the Stat1500 (Part B) sub-folder or the Statub92 (Part A) sub-folder.
National Government Services offers a single ‘mailbox’ option where all response files can be placed. PC-ACE will stage the files to the appropriate folder for translation.

Viewing the 277 Response Report
Once the response files have been moved to the proper folder location, go to the Professional or Institutional Claims Menu. Select the Maintain menu item. To read the 277, Select Claim Status Response and Acknowledgement Log.
Note: If you submit both Institutional and Professional claims and save the response files to the ‘mailbox’ folder the response reports will be viewable under both the Institutional and Professional tabs. User can delete any reports that are not needed by selecting the delete button.

The following screen will be displayed to read the 277. Click View Response Report.

The above screen displays a listing of all currently imported 277 file. The last column gives the “Archive File” name, which is the name of the imported copy of the 277 that is stored in a subdirectory of the Stat1500 or StatU92 folder named “Archive.”
From the Claim Status Response File Log screen, select the 277 to be displayed and select View Response Report. The following report will display:

Select View Post Report to show the status of each claim as a report in PC-ACE.

PC-ACE Claim Status Response Post Report

PC-ACE Transmitted Claims Status per 277

Please see the PC-ACE User Guide and the PC-ACE Quick Reference Guide for additional assistance with PC-ACE.
Reviewed 9/23/2024